Bleed

To make sure that your document is printed correctly, we require the design to extend an 1/8 inch beyond the trim line. The extra space is called the bleed area. “Adding bleed” protects the document from small misalignments, paper creep, and undesired white space.
When designing a new document, set up your bleed area in the New Document dialog box. Also check that the document has appropriate bleed when exporting your PDF to us. If the final PDF lacks proper bleed settings, your file may be returned to you.
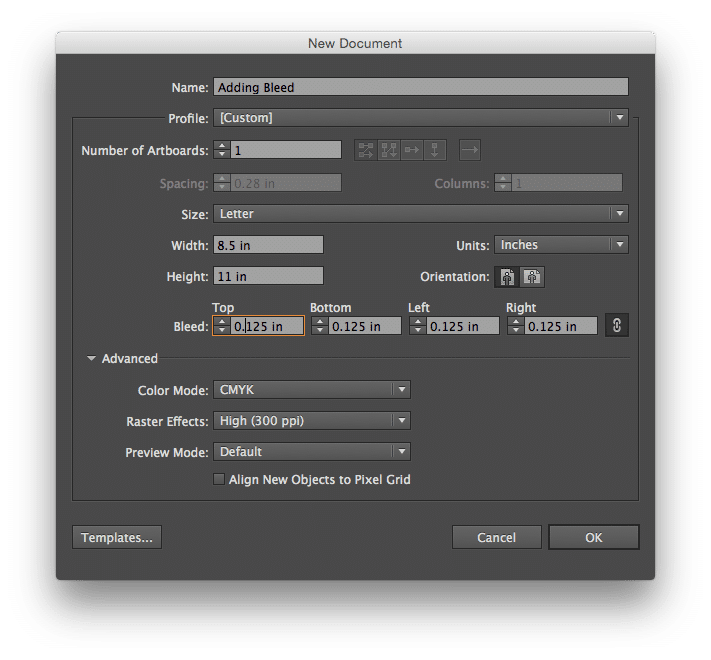
Adding Bleed in Illustrator
- Go to File > New
- Name your print design something appropriate
- Select “Inches” from the Units dropdown menu
- Enter the final width and height you would like your piece to be
- Beside Bleed add 1/8 inch (.125in) to each side of the document
- Select CMYK for the Color Mode
- Select High (300 ppi) from the Raster Effects dropdown menu
- Press Okay
- *The bleed area is between the black and red lines.
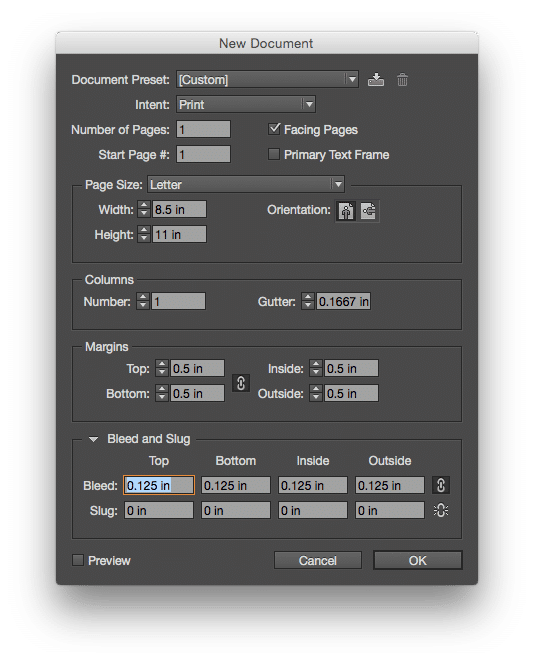
Adding Bleed in InDesign
- File > New
- Enter your desired number of pages
- Enter the Width and Height of your Finished Folded Document
- Add your desired amount of Margin (We recommend at least .125 in)
- Enter .125 inches (1/8 inch) Bleed for all four sides
- Press Okay
- *The bleed area is between the black and red lines.
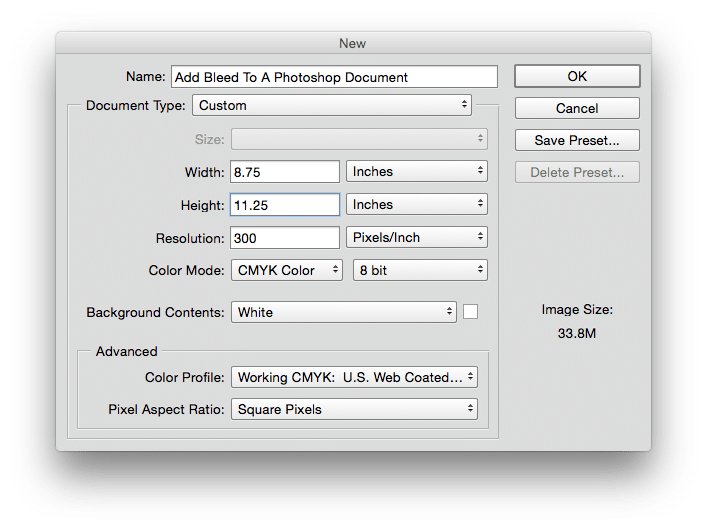
Adding Bleed in Photoshop
- File > New
- Name your Document
- Beside Width: enter the Width of the Final Size + .25 inches
- Height: enter the Height of the Final Size + .25 inches
- 300 Resolution
- Select CMYK Color for the Color Mode
- Press Okay
- Using Guides mark .125 inches (1/8 inch) on each side of your document to mark where the document will be trimmed
*Example: To design an 8.5″x11″ Letterhead in Photoshop, make your document 8.75″x11.25″
*The bleed area is between the black and red lines.